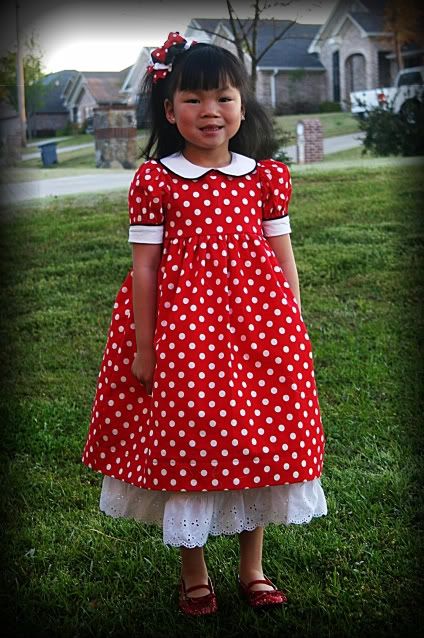
I have the privilege of serving at camp this week with some fab young ladies. Today, we celebrate America. Stand beside her and guide her... My home sweet home.
Wednesday, July 4, 2012
Wednesday, June 27, 2012
test
SOOO... if I wanted to provide designs for my readers, would it work? For example, if I gave my viewers this embroidery design
and I posted a link like this: Happily Ever After embroidery design
would it work?
and I posted a link like this: Happily Ever After embroidery design
would it work?
Tuesday, June 26, 2012
Scrapbook for a Superstar
This past weekend, I was so thrilled to attend Martha Pullen's Sewing Market at the Arlington Convention Center. The market in and of itself is FABULOUS! But the most thrilling part of the weekend for me was being present alongside a dear friend, Carla Crim aka The Scientific Seamstress! She was the celebrity guest for Saturday morning's presentation. It was such fun to spend a bit of time with Carla - and it was fantastic to see her shine in the sewing world.
To commemorate the event, I decided to make a scrapbook for Carla that contained a few memories from dear friends, along with notes of encouragement for her big day. She can fill the book with pictures and memorabilia from the weekend so that she will always remember the event.
The front of the cover ready for presentation
Front of album
inner page with familiar faces
one of the inner pages from the album
the right flaps remove from the pocket to expose a fold out
area for photos and journaling
This album was created using Kathy Orta's Soft Spine album tutorial. I've found Kathy's tutorials very straightforward and they produce fabulous results. If you're a scrapbooker and are looking for a fast album with high impact, I highly recommend her!
Monday, May 16, 2011
creating JOY! - a lesson in burlap!
Next weekend I will gather with 700 of my closest friends for a women's retreat. It's a yearly event, and always proves to be lots of fun! I have the joy of being assigned to assist with the "Cup of Joy Coffee & Karaoke Bar" on Saturday evening. My task is to provide table decorations for the event. I was provided vases and earthy dried natural elemants to fill them. I felt they could use just a bit of color, so I've added a simple stem to complete the filling of the vases. I wanted something to place under the vase to help to fill the table area. SO, drawing inspiration from the natural elements, as well as a current trend in home decor, I decided to make burlap table squares.
Now,. you may ask (as the cutting table attendant at Hobby Lobby did this morning) - WHY BURLAP? Here are my simple reasons.
1. It is earthy, natural looking.
2. It is inexpensive (I purchased the burlap I'm using at Hobby Lobby for $3.99/yard).
3. It doesn't have to be sewn - making this an easy, no sew project.
I decided that I would make each square approximately 20" square (give or take). After cutting the squares, I simply pulled a few of the pieces of weaving so that the burlap would fray. This is the square following squaring and fraying.
Then I took this handy dandy stencil that I also found at Hobby Lobby. (I was really glad that I found a stencil that said "JOY" - it was perfect for this project!) I applied stencil adhesive to the back of the adhesive and used thispie crust roller brayer to make sure that all of the edges of the word were pressed down well. I also made sure to put a piece of paper underneath the area that would be stenciled so that ink would not seep through the burlap.
After the stencil is filled
And with the stencil removed
With a completed square and the sample vase (the real set up will have coffe beans sprinkled around on the burlap square)
Rinse and Repeat - 15 times! And this is what you end up with - ready to be on display for the wonderful women of Texas!
I've been wanting to do a burlap project for a long time. Now that I know just how easy and quick it is, I'll be making up some projects for my own home. I hope I've encouraged you to do the same! If so, I'd love to read your comments on what you plan to create!
Go make some JOY!
Now,. you may ask (as the cutting table attendant at Hobby Lobby did this morning) - WHY BURLAP? Here are my simple reasons.
1. It is earthy, natural looking.
2. It is inexpensive (I purchased the burlap I'm using at Hobby Lobby for $3.99/yard).
3. It doesn't have to be sewn - making this an easy, no sew project.
I decided that I would make each square approximately 20" square (give or take). After cutting the squares, I simply pulled a few of the pieces of weaving so that the burlap would fray. This is the square following squaring and fraying.
Then I took this handy dandy stencil that I also found at Hobby Lobby. (I was really glad that I found a stencil that said "JOY" - it was perfect for this project!) I applied stencil adhesive to the back of the adhesive and used this
Now, this is where I went commando. I had purchased stencil paint and daubers. I carefully applied the paint to the first square. It looked great. However, because of the texture of the burlap, the dauber was messed up after just the first square. I didn't want to have to go buy a boatload of daubers. SO, I improvised. I pulled out my bag of sharpies. After testing a small patch, I realized that the sharpie would work on the fabric. That helped me to decide to complete the project with sharpie instead. I'm really glad that I did, too. Each square were very quick to stencil using the sharpie.
After the stencil is filled
And with the stencil removed
With a completed square and the sample vase (the real set up will have coffe beans sprinkled around on the burlap square)
Rinse and Repeat - 15 times! And this is what you end up with - ready to be on display for the wonderful women of Texas!
I've been wanting to do a burlap project for a long time. Now that I know just how easy and quick it is, I'll be making up some projects for my own home. I hope I've encouraged you to do the same! If so, I'd love to read your comments on what you plan to create!
Go make some JOY!
Monday, May 9, 2011
Will I Ever Learn?
That blogging is good for me? That sharing my thoughts and creativity is therapeutic? That others actually LIKE to read my blunderings? SIGH!
Once again, it's been a long time. I could make a list as long as my arm of excuses, but they really don't matter. All that I can do is try to remember that I really should enjoy this means of sharing.
Since my last post, our family has been on the move. Twice. And, yes, you guessed it, we are on the move once again! This move will take us to the city of McKinney, Texas. We're very excited about the opportunities that await us there, and are in hyper packing mode!
We're also very much ready for summer (at least for summer break!). Shortly after our move, we have a big, fabulous, relaxing vacation planned. To someplace really cool. No, I mean REALLY COOL! As in icebergs and such. We've booked a cruise to Alaska - and we can hardly stand the excitement!
So, until I get back into the groove of blogging, let me post some pics of some projects that I've worked on since my last post.
I promise I'll try to do better! I'm making it a goal - post once a week! Until next time - enjoy the JOY!
Wednesday, May 5, 2010
SWEETNESS!
There's no other way to describe it!
It was so much fun to create this set for Miss E!
and look at that SMILE! Isn't it just contagious? What a beautiful, beautiful child!
SO, the details! I used the always dependable, never let it leave the table Simply Sweet Top and Dress and Easy Fit Pants patterns by The Scientific Seamstress to create this adorable set. I modified the bodice slightly (shortened the top and the bottom) and made the ties so that they would knot through the buttonholes rather than using buttons.
The totally adorable, mix and match with every pattern (garanamil matching easy!) fabric is by the fabulous Jennifer Paganelli! Can't ever get enough of these two!
Sunday, May 2, 2010
New pattern!
I've been away for a few weeks - visiting with my BFF, and tied up with several events.
Since I last posted, life has changed tremendously! We've gone through the roller coaster ride that is "move day" in our professional life. We have learned that we will be transferring from our current appointment, and will have a new home. We will be moving to Houston at the end of June. SO, lots of things to accomplish between now and then. Which includes packing up the sewing room - UGH!
BUT, between now and then, I've got a few things to accomplish!
I've had the privilege of testing a new pattern for Carla (The Scientific Seamstress) in connection with the AMAZING Jennifer Paganelli. It is the greatest pair of BOXER SHORTS!
I had to make them for myself in a new Jennifer Paganelli print from the So St. Croix line. The beautiful Genevieve is just GORGEOUS!
I LOVE, LOVE, LOVE them!
(and if you promise not to tell, I'll even post a sneak peak!)
Thursday, April 15, 2010
Back to the JOY!
The name of my blog is JOY of CREATING! For a reason. I have always found great satisfaction, great JOY in creating. Even at a very young age. My mind just works that way for some reason. I enjoy disecting something in my mind to figure out how it is made and then creating it in my own way.
As a young child, I remember my favorite thing in the world was to go to the craft store! It was like Christmas for me!
When my son was very young, I was an avid scrapbooker. I LOVED preserving memories of our family and using my hands to add a special touch that only I could create!
In most recent years, I have turned to sewing as my creative outlet of choice. It gives me such great satisfaction to create a wearable work of art that my daughter or others may enjoy wearing. There is nothing like the feeling that I get when someone asks my daughter where she got her beautiful dress and she beams with pride and says, "my MAMA made it!" It's SHEER JOY!
I realize that often times, I don't take the time to create the things that bring me the greatest joy. I allow myself to get caught in just creating. Just because. And I want more... I want the JOY of creating! SO, I vow to myself today, "MORE JOY!" I will spend more time creating things that bring me joy, and less time just creating!
Speaking of Joy - this YARDS upon YARDS of satin brings me joy! It makes my heart smile! I can't wait to wear it next weekend for a presentation. It wasn't such a joy to sew, but boy, is it fun now!
The pattern suggested that it be left to rest for a few days before hemming to insure that it hangs correctly. SO, it's not quite finished, but it will be soon!
Monday, April 12, 2010
A new favorite from 2009
There were lots of fun new Sis Boom patterns (written by the ever fabulous, Scientific Seamstress) to be tested in 2009! My favorite -
Something for ME! The Patricia Tunic!
Resurrection!
Of my blog, that is!
Wow! It's been a LONG time since my last post!
So, in an attempt to catch up a bit - I'll post a few of my favorites!
First, a few new additions to the "Princess in July" collection.
Each dress is created using The Scientfic Seamstress Simply Sweet pattern with alterations of my own. Carla has also added suggested alterations to "princessify" this versatile dress in her blog
First is Ariel! My daughter, AbbyGrace's favorite!.
Which were quickly followed by Belle and Cinderella.
They were SO fun to create! They were greatly received by both my daugther and several customers! They were perfect for a trip to Disney in the August heat!
Wednesday, May 27, 2009
Getting ready for Summer!
I had a great time stitching up a Princess Aurora inspired sundress for a young lady that will be spending some magical moments with her family at Walt Disney World.
This dress began life as a Carla C's Simply Sweet dress (natural waist, scrunched elastic straps and ruffled skirt). A few modifications to create the illusion of a princess seam as well an addition of a peplum transform this sweet dress into a great dress for a precious dress to brave the hot days of summer.
I hope she LOVES it!
Friday, May 15, 2009
New SOPHIE TUNIC!
It just doesn't get any better than this! My friend, Carla C teamed up with a fantastic fabric designer (whom I'm now proud to call a friend as well!), Jennifer Paganelli to create a FABULOUS new pattern. The Sophie Tunic, available at You Can Make This, can be made in several different lengths as well as different sleeve lenghts. It is perfect as a cover up for the beach, or as a sweet retro inspired top. I was THRILLED to be able to test this pattern. I've got several more of these to stitch up (oh, to find the time!). The next version on my cutting table is using Jennifer's gorgeous Sis Boom fabrics! OOH! YUMMY!
Monday, May 4, 2009
And the WINNER IS...
Today is the day! As promised before I left for my magical trip, I have selected a winner to receive a princess stripwork jumper. And the winner is... LOST IN STASH (AKA FLEA from Disboards). Here is her comment:
Ooooh I love your blog - the dress is so cute :). I don't know if you want to enter me or not being on the otherside of the world but I would pay for shipping if I won :)Have a wonderful time :)Flea from disboards :)
LOST IN STASH - contact me for your choice of size - available in sizes 6 months - 8 years, as well as an address of where to ship. I'll do the magic!
The fine print:
Winner was randomly selected on random.org
Saturday, April 25, 2009
Blogabration! WOO HOO!
Well, the time has finally come! I'm going to DISNEY WORLD! And not only am I going to Disney World, but I'm going with my MOM! Yep, that's right - it's a PRINCESS TRIP! My dad will join us after a few days, and my BFF and her husband will be there as well. I can't wait! It is going to be the best of all worlds. I'm so very excited, I can't help but want to celebrate. So, in an act of celebration, I've decided it only appropriate that all of my readers join in the fun!
I've posted my most recent Princess stripwork jumper. It was created for a fellow DISer and it was the perfect creation to get me in the mood for my princess trip. In celebration ONE OF YOU - my faithful readers - will receive a princess stripwork jumper of your own! Here's how it will work. All comments that are made on my blog while I'm away (beginning today, Saturday, April 25, 2009 and ending Sunday, May 3, 2009) will be entered into a drawing. The winner will be drawn on Monday, May 4, 2009. SO - please help me celebrate! Leave me lots of comments! Then stay tuned for lots of pictures and lots of gushing of what a great time I had at the Happiest Place on Earth!
Saturday, April 18, 2009
Trying something different
I've seen these really cool glass pendants that have pictures in them on etsy and I've been wanting one! Of course, I could have just bought one from one of the many sellers on etsy. But then I would always have this nagging voice inside my head that said, "how'd they do that?" SO, in the true nature of a crafter, I decided to make one myself. This was my first attempt, and I have to say that it was very simple. I did learn a few things from my first creation, but I really love the end product. Enough that I'll even wear it! I love this project because the possibilities are endless. I can't wait to make up a few more, and especially, make a few for AbbyGrace to wear with her outfits that I make her. I see several of these in my future - what great little pendants for Disney trips these will make!
EDITED TO ADD:
Actually, I can't take credit for coming up with the idea. There are tons of these all over etsy. But to learn how to do it, I purchased a kit from kristenskrafts on etsy. The kit came with instructions. However, I found a set of instructions that will achieve the same end result at
The only difference that I can see is that I used a product called Diamond Glaze as the adhesive on mine.
One more thing - the pics that I posted are of the 1.4 inch glass tile. There is also a smaller tile (about 1") that can be purchased. I don't think that either of these are any heavier than any other pendant I would wear. You would think that since they're glass they would be, but not so. I'll probably use the smaller tile for AbbyGrace because I think this size will be a little too big for her.
Saturday, April 11, 2009
Quick Easter Egg Hunt dress
.jpg)

This was totally inspired by a fellow DISer that created an Easter dress for her daughter using the Vida pattern. When I saw it, I knew I wanted to make one, but we already have Easter outfits planned. What to do? I sewed it up real quick for AbbyGrace to wear to an Easter egg hunt at our church today. The front and back center panels were created on my embroidery machine. My Baby Lock imagine serger made the ruched ruffles a breeze! LOVE that machine! I did a rolled edge hem along the sides of a 2" strip of fabric, then ran it through my sewing machine at the highest tension and longest stitch length to gather down the middle.
Wednesday, April 8, 2009
My Most Recent Creation

I have a favorite pattern designer. Her name is Carla C. She is also known as "The Scientific Seamstress". She is linked in the side bar because I can't figure out how to link here.
She really knows how to bring out the best seamstress in me. Her designs are very straightforward and detailed. They are exactly what I need to create designs that not only help me create cute things, but also really help me to grow as a seamstress and step outside the box to create things I never imagined possible.
Last week Carla asked me to be a part of a group of fabulous seamstresses and one tailor to test a new pattern that she was writing. The new pattern debuted at http://www.youcanmakethis.com/ on Monday. Here are a few of my thoughts regarding the pattern:
"Carla has done it again! This time she has created the quintessential girlie dress! This is the dress that I have longed to make for my daughter since I began sewing again almost two years ago. Yet the idea of a puffy sleeves and a back closure have caused me pause from attempting this style of dress. I knew that with Carla C's instructions, I could make the dress of my longing for my daughter. Her always clear, highly definitive directions left no room for error on my part. Carla guides the creator through each and every step! From creating the perfect peter pan style collar, to making the perfect puffy sleeve, it's all included! But if it is a simpler style with no collar and/or no sleeves, you're given the same attention to detail with instructions that will create the perfect dress that you have envisioned. It just doesn't get any better than this! I'll be sewing this dress up over, and over, and over again! Thanks so much, Carla for a PRECIOUS DRESS!"
And they're OFF!
The truth is, I've had this blog set up with nothing on it for a few months. I've had good intentions of starting an amazing blog where I could share things that I have enjoyed creating for my family and having all of my friends "ooh" and "aah" over them. But in all honesty, not everything that I create always causes that response. So, I've been hesitant to actually begin posting. With so many awesome blogs on the web these days, I have felt a lot of pressure to either have a perfect blog, or no blog at all.
Then, today, I was reading my friend, Tom's blog (linked in the sidebar because I can't figure out how to link here yet), and it dawned on me. Blogging should be about me sharing with friends, not about perfection. His generosity and desire to share inspired me. SO, here I am. Let the sharing begin!
Subscribe to:
Posts (Atom)